Picture this scenario: you're all set for a thrilling ride on your electric scooter, but when you press the power button, nothing happens. Frustrating, right? If you've ever encountered the perplexing issue of your electric scooter refusing to turn on, you're not alone. This common problem can leave even experienced riders scratching their heads
In this comprehensive blog post, we will delve into the world of troubleshooting electric scooter start-up issues. We'll explore the most frequent culprits behind this inconvenience and equip you with practical and effective solutions to get your scooter up and running in no time.
Whether you're a seasoned electric scooter enthusiast or a first-time rider, understanding the potential causes and learning how to fix them can save you time, money, and unnecessary stress. So, let's dive in and unravel the mysteries behind why your electric scooter won't turn on and empower you with the knowledge to resolve these problems like a pro.
In the sections that follow, we'll take a closer look at common issues that can hinder your scooter's startup, such as faulty batteries, damaged components, and other system malfunctions. We'll then guide you through step-by-step troubleshooting techniques to identify the root cause and provide practical solutions to address each problem.
Your thrilling electric scooter adventures are just around the corner, so let's get started on uncovering the secrets to reviving your ride and ensuring smooth, carefree journeys on your trusty electric scooter. Strap on your helmet, and let's ride into the world of electric scooter problem-solving!
Halted By A Dead Battery
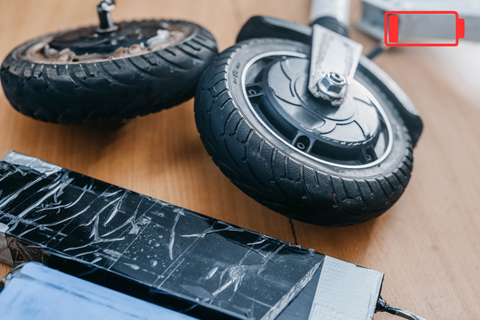
A Common Challenge: Dealing with a dead battery is a common issue that electric scooter owners encounter. Whether it's caused by a faulty battery, improper charging practices, exposure to extreme cold, or natural degradation of the battery's capacity over time, the frustration of a non-responsive scooter is all too real.
Distinguishing Dead from Low: It's important to distinguish between a dead battery and a low battery. A dead battery results in the scooter not turning on at all, while a low battery may still have some energy charges left. Charging the battery can easily resolve the latter, but a dead battery requires a different approach.
Winter Storage Woes: Leaving your electric scooter idle for prolonged periods, especially during the winter, can lead to a dead battery. To mitigate this, we suggest charging the battery to a level between 45% and 80% before storing it for winter. Regularly topping up the charge to these optimal percentages each month can also help maintain battery health.
Reviving the Battery: If you find yourself facing a dead electric scooter battery, there are steps you can take to revive it. Before connecting the battery to the charger after the winter season, check the terminals for rust. If corrosion is present, apply a generous coat of baking soda and sprinkle water to neutralise it.
Charge, Ride, Repeat: After taking these measures, thoroughly charge the battery, and your scooter should spring back to life. When the battery dies while you're out on a ride, remember to let the scooter cool down before plugging it into the charger.
A dead battery may cause temporary setbacks, but with the right knowledge and maintenance, you can revitalise your electric scooter and embark on countless exciting adventures with ease. By giving your battery the care it deserves, you'll ensure a smooth and enjoyable ride every time you hit the streets.
The question is, however, how do I fix this issue? We explain this in the section below.
Fixing a Dead Battery: Charging and Troubleshooting
The key to reviving a dead electric scooter battery is to ensure it gets a full charge. However, keep in mind that it might take longer than usual to charge the battery fully. To avoid facing this situation again, it's best to prevent the battery from running out of charge entirely. Always make it a habit to charge your electric scooter battery at the end of each day.
If you encounter issues with the battery not charging, there are a few troubleshooting steps you can take:
Check Different Sockets: Try plugging the battery charger into different sockets to see if the charging issue is related to a faulty power outlet. Sometimes, a socket might not be supplying sufficient power, and using an alternate one can solve the problem.
Use a Voltmeter: Investing in a voltmeter can be a helpful tool to check whether your battery is charging or not. By measuring the voltage, you can determine if the charging process is effective.
Consider Battery Replacement: If despite troubleshooting, the battery still doesn't charge, it may be time for a battery replacement. Over time, batteries can lose their ability to hold a charge, and a new one may be necessary for optimal performance.
When it comes to replacing the battery, always opt for a new one from a reliable source. Properly dispose of the old battery according to local regulations or recycle it responsibly.
Soaked and Unresponsive: Could water be the culprit?

While most e-scooter companies advise against riding in rain or snow, unexpected scenarios can leave your scooter exposed to moisture. Unfortunately, this exposure to water can result in damage to internal components, leading to the dreaded issue of your scooter failing to turn on.
Water and electrical components don't mix well, and even a small amount of moisture can wreak havoc on sensitive parts within the scooter's system. The water may cause short circuits, corrosion, or other malfunctions that prevent the scooter from powering on.
To safeguard your electric scooter from potential water damage, it's essential to be cautious when riding in inclement weather or leaving it outside in rainy or snowy conditions. Whenever possible, store your scooter in a dry and sheltered location, especially during unfavourable weather.
Should your scooter encounter wet conditions unexpectedly, such as during an unforeseen rain shower, it's crucial to take swift action to minimise potential damage. Avoid attempting to power on the scooter immediately after exposure to water. Instead, allow it to dry thoroughly in a well-ventilated area before attempting to turn it on again.
In cases of significant water exposure or persistent issues, it's advisable to seek professional assistance or contact the manufacturer's support for further guidance. By exercising caution and being mindful of your scooter's vulnerability to water, you can protect its internal components and ensure a reliable and responsive ride whenever you embark on your electric scooter adventures.
How to Fix a Wet Electric Scooter
Even though we advise against riding in heavy rains, some scooter owners may find their rides unresponsive after encountering unexpected splashes of water. If you ever face this situation, follow these simple steps to fix your wet electric scooter:
Disconnect the Battery: Open the deck of the scooter and carefully disconnect the battery. Isolating the battery from the scooter is the first step to prevent any potential damage to its internal components.
Dry the Battery: Use a dry piece of cloth to thoroughly dry the battery. If you notice any corrosion on the battery terminals, prepare a mixture of baking soda and water to clean them. After cleaning, dry the terminals once more to remove any moisture.
Dry Beneath the Deck: Utilise an air hose to fully dry the space beneath the deck and the entire scooter. This will ensure that all areas are free from moisture and water residue. Afterwards, use another dry cloth to wipe down the scooter once more for thorough drying.
Keep the Battery Separated: Keep the battery away from the scooter for approximately 24 hours to allow all components to dry completely.
Fully Charge the Battery: After the designated time, insert the battery back into the scooter. Before switching the scooter on, fully charge the battery.
Turn it On: With the scooter now completely dry, power it on. If all the steps were followed diligently, the scooter should switch on without any issues.
Important Tip: When your electric scooter comes into contact with water, it is essential not to switch it on before fully drying it with an air hose. Avoid using a hairdryer, as its heat may damage sensitive electronic components.
Waterproofing Tips For Your Electric Scooter
To shield your electric scooter from water damage and enhance its resilience against wet conditions, consider implementing these effective waterproofing tips:
Silicone All Bolt Holes: Apply silicone sealant to all the bolt holes on your scooter. This creates a waterproof barrier, preventing water from seeping into sensitive areas where bolts are inserted.
Loctite All Bolt Holes: Using Loctite or similar thread-locking adhesive, secure all bolt holes tightly. This not only helps to prevent water intrusion but also ensures that bolts stay securely fastened during rides.
Wrap a Rain Cover Around the Scooter: Invest in a high-quality rain cover specifically designed for electric scooters. These covers provide comprehensive protection against rain and moisture, shielding your scooter from the elements when parked or in storage.
Tape Over the Charging Port: While most modern electric scooters come with some degree of water resistance for charging ports, adding an extra layer of protection is prudent. Use waterproof electrical tape to seal the charging port when not in use, preventing water from seeping in.
Get a Plastic Cover for the Cockpit: Consider obtaining a plastic cover or shield for the entire cockpit area, encompassing the throttle, screen, display, and other electronics on the front. This transparent cover acts as a shield against rain, ensuring your vital components stay dry and functional during wet rides.
Dealing with a Flat Tyre (Causes motor burnout)
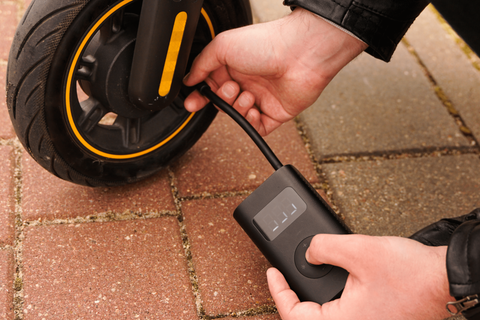
Among the most common issues faced by e-scooter riders, a flat tyre can put a damper on your riding experience, especially if you have pneumatic or air-filled tyres. Prevention is the key, as a flat tyre can lead to motor burnout due to the extra load it places on the scooter. If you notice your journey feeling sluggish or less smooth than usual, it's crucial to inspect the rubber and address the issue promptly.
To mitigate the risk of long-lasting damage and ensure optimal performance, keeping your tyres properly pumped up is essential. Regularly using a pump to maintain the correct tyre pressure, at least once a week, can significantly reduce the likelihood of encountering a flat tyre during your rides.
Remember, a well-inflated tyre not only enhances your scooter's efficiency but also improves your overall safety and riding experience. By staying vigilant and taking proactive measures to maintain your tyres, you can enjoy smooth and trouble-free rides on your e-scooter for miles to come.
Inspecting the Fuse or circuit breaker
When facing issues with your electric scooter not turning on, it's crucial to inspect the fuse or circuit breaker. The fuse, a protective device, can get burnt due to various factors such as overheating or overcharging. To identify the problem and ensure the scooter's safety, follow these steps to check the fuse or circuit breaker:
Examine the Fuse: Locate the fuse box on your electric scooter. Usually, it's located near the battery or controller. Carefully remove the fuse and visually inspect it for any signs of damage or a burnt appearance. If the fuse appears to be blown, it needs replacement.
Test the Fuse with a Multi-Meter: Using a multimeter, set it to the "ohms" setting and touch the fuse's prongs with the meter's probes. If the multi-meter reading shows "OL" (open loop) or an infinite resistance value, it indicates a blown fuse that requires replacement.
Resetting the Circuit Breaker: If your electric scooter is equipped with a circuit breaker instead of a fuse, look for a reset button on the scooter or the charger. Press the reset button to reset the circuit breaker. In case it was tripped due to an overload, this action can restore power to your scooter.
Replace the Fuse or Reset the Circuit Breaker: If you find a blown fuse, replace it with a new one of the same rating. If the circuit breaker tripped, resetting it should restore power to your scooter.
By diligently checking the fuse or circuit breaker, you can quickly identify and resolve issues that may hinder your electric scooter's startup. Regular maintenance and prompt action in case of any electrical faults contribute to keeping your scooter in optimal working condition, ensuring many miles of worry-free rides.
The throttle is not connected properly

An improperly connected throttle can be a common culprit behind an electric scooter's failure to turn on as expected. The throttle plays a vital role in allowing riders to control speed and power, but it must be connected securely to the relevant connectors for the scooter to power on.
Identifying the Issue:
Non-Responsive Throttle: If your electric scooter's throttle is non-responsive when you attempt to power it on, there may be an issue with its connection.
Display Connectors: The throttle connects to the display through an array of wires. These wires are crucial for the throttle to function optimally and enable the scooter's start-up.
Fixing the Throttle:
Inspect the Connections: To properly connect the throttle, carefully examine the display and the handlebar area to ensure all the wires leading from the display are correctly attached to the throttle.
Verify the Wires: Check that all the wires from the display are indeed connected to the throttle. If any of the wires appear loose or disconnected, reattach them securely.
Replace the Throttle: If after ensuring proper connections, the throttle still doesn't work, it might be necessary to replace the throttle with a new one.
Ensuring a well-connected throttle is a crucial step in maintaining the proper functionality of your electric scooter. By taking the time to inspect and address any connection issues, you can quickly resolve the non-start-up problem and continue enjoying seamless rides on your electric scooter. Remember, safety and proper maintenance are key to the longevity and performance of your scooter.
Tackling Engine Overheating
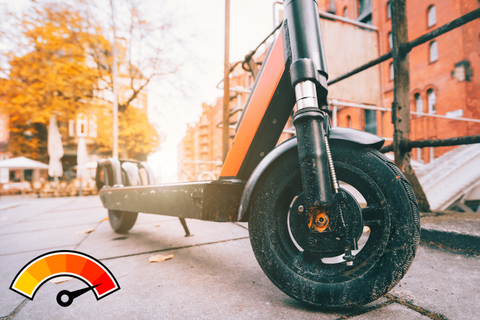
Experiencing excessive engine heat in your electric scooter can be concerning and may have adverse effects on both the scooter's performance and battery life. Overheating can arise due to factors such as high ambient temperatures or overloading the scooter. To address this issue and prevent potential damage, take immediate action when you sense your electric scooter's engine heating up.
Identifying Engine Overheating:
Elevated Temperature: If you notice that the engine's temperature is rising to an unusual level during your ride, it may indicate engine overheating.
Environmental Factors: High temperatures in the surroundings, particularly in hot weather conditions, can contribute to engine overheating.
Overloading Considerations: Overloading your electric scooter with excessive weight can place added strain on the engine, leading to overheating.
Mitigating Engine Heat:
Turn Off the Scooter: When you sense engine overheating, it is crucial to turn off your electric scooter immediately. Allowing the scooter to cool down is essential to prevent further damage.
Identify the Cause: Assess the potential reasons for overheating, such as environmental factors or overloading, to determine the appropriate action.
Provide Adequate Cooling Time: Give your electric scooter sufficient time to cool down before attempting to use it again. This will help protect the engine and battery from further negative impacts.
Refrain from Overloading: To prevent future occurrences of engine overheating, avoid overloading your electric scooter with excess weight beyond its capacity.
Seek Professional Assistance: If the issue persists or you are unsure about the cause of engine overheating, it's advisable to seek help from a qualified technician who can perform a thorough inspection and address any underlying problems.
Utilising Error Codes

When turning on your electric scooter, you might encounter an array of perplexing error codes, such as E001, E7, E19, and more, often accompanied by incessant beeping or a red spanner symbol (common in Ninebot Segway's ES models). These error codes can be as numerous as days in a month and vary from one scooter model to another, making diagnosis time-consuming.
The root causes of these error codes can range from wear and tear to poor manufacturing. The road's impact can lead to dislodged motherboards, loose wires, and damaged chipsets. Particularly with the widespread clones seen on UK streets, poorly connected batteries and corrosion issues are also common findings.
Locate the Codes: Familiarise yourself with the error codes specific to your scooter model. Each manufacturer may have slightly different error code systems. Refer to the user manual to find a comprehensive list of these codes for your scooter.
Interpreting the Codes: When an error occurs, the displayed code will point you towards the general category of the problem. For instance, it may indicate a motor issue, a battery problem, or a potential controller malfunction.
Consult the User Manual: To understand the meaning and significance of each error code, consult the user manual provided by the manufacturer. The manual will offer explanations and potential steps to take in response to specific error codes.
Proper Diagnosis: While error codes offer valuable guidance, they may not pinpoint the exact cause of the issue. Once you identify the general category, you may need to perform further troubleshooting or seek professional assistance to diagnose and address the specific problem.
Extra tip: You can turn to online tutorials, where DIY experts share hour-long tutorials from their garages.
A Faulty Controller

The controller serves as the essential brain of your electric scooter, translating your actions, such as pressing the accelerator, into motor commands that propel the scooter forward. It also plays a crucial role in regulating the scooter's speed within a safe range. Given its significance, a faulty controller can lead to undesirable consequences, such as sudden acceleration or little to no acceleration at all, both of which can compromise rider safety.
Troubleshooting a faulty controller
Dismantle the Controller: Begin by carefully dismantling the controller to gain access to its internal components.
Inspect Wiring: Thoroughly examine the wiring for any loose or damaged connections. Tighten any loose wires and replace damaged ones with new, suitable replacements.
Reassemble and Test: After addressing the wiring, reassemble the controller, ensuring all connections are secure. Test the electric scooter to determine if the acceleration issue has been resolved.
Combating Rusted Electricals

Rust in your electric scooter's electrical components can cause your ride to fail to turn on and lead to various performance issues. Among the most vulnerable parts is the motor, situated close to the ground, making it susceptible to rust from rain and ice patches. To protect your scooter from rust-related problems, it's crucial to waterproof the motor and address any rust on the battery terminals promptly.
Identifying Rusted Electricals:
Motor Overheating: A rusted motor may overheat quickly after a short ride, indicating potential rust-related issues.
Gradual Reduction in Speed: If you notice a gradual decline in your scooter's speed over time, it could be a sign of rust affecting the motor's performance.
Battery Terminal Issues: Rust on the battery terminals can manifest as corrosion or exclusive rusting.
Fixing rusted electrics
Clean with Baking Soda Solution: To address rust in the motor and battery terminals, create a mixture of baking soda and warm water. Dip a toothbrush into the solution and gently scrub off the rusted areas.
Use Steel Brush or Nylon: For stubborn rust, consider using a steel brush or nylon in the baking soda solution to gently scrub off oxidised parts.
Dry the Electricals: After cleaning, use an air hose to thoroughly dry the motor and battery terminals, ensuring no moisture remains.
Waterproof the Motor: To prevent future rust issues, seal the motor with silicone to shield it from splashes of water and moisture effectively.
Silicone the Battery Terminals: For the battery, apply silicone to all the bolt holes and terminals to create a protective barrier against moisture.
By proactively addressing rust in your electric scooter's electrical components, you can maintain optimal performance and extend the life of your scooter. Regular maintenance and waterproofing measures will help protect your scooter from rust-related woes, ensuring smooth and enjoyable rides for miles to come.
Testing the power switch or key switch

If your electric scooter is not functioning properly, one of the first troubleshooting steps you can take is to test the power switch or key switch. Follow these instructions to check for any issues with the switch:
Move the Switch: Gently move the power switch or key switch between the "on" and "off" positions multiple times. Sometimes, the switch may get stuck or develop loose connections, causing the scooter to malfunction.
Check for Loose Connections: If you notice that the switch feels loose or wobbly, it may indicate a problem with the switch. Loose connections can disrupt the flow of power, leading to scooter issues.
Use a Multimeter: To further assess the switch's functionality, you can use a Multimeter. Set the Multimeter to the continuity or resistance mode and check if there is a complete circuit when the switch is in the "on" position and an open circuit when it's in the "off" position. If the switch fails to show the expected readings, it might be faulty and in need of replacement.
Addressing a turned-on kill switch

If your electric scooter turns on but fails to move, one possible reason could be that the kill switch is turned on. The kill switch is a useful feature to save energy when the scooter is not in use or while charging. However, if it's accidentally left in the "on" position, it can prevent the scooter from functioning correctly. Here's how to fix the issue when the kill switch is turned on:
Check the Kill Switch: Locate the kill switch on your electric scooter. It's usually a small switch located near the handlebars or on the scooter's dashboard.
Switch it Off: Ensure that the kill switch is in the "off" position. If it's currently turned on, simply switch it off.
Restart the Engine: After turning off the kill switch, try to restart the scooter's engine.
Check the Battery: If the scooter still doesn't move after turning off the kill switch, proceed to check the battery. Verify if the battery has sufficient charge to power the scooter.
Understanding Why Your Electric Scooter Turns On But Doesn't Move
If you find yourself in a situation where your electric scooter powers on but fails to move, several potential reasons may explain this issue. Identifying the cause is crucial to resolving the problem and getting your scooter back on the road.
1. Dead or Low Battery:
One of the primary reasons for your electric scooter not moving despite turning it on is a dead or low battery. If the battery lacks sufficient power, the scooter won't be able to function. To address this, connect the scooter to a charger and allow the battery to fully charge before attempting to ride again.
2. Motor Malfunction:
A malfunctioning motor can also be responsible for the scooter's lack of movement. Various factors, such as loose connections or internal motor issues, can lead to this problem. If you suspect a motor-related issue, it's advisable to seek the expertise of a certified repair shop for a thorough diagnosis and proper resolution.
3. Throttle Lever Position:
For scooters equipped with a throttle lever, the position of the lever is critical. If the throttle lever is not in the correct position, the scooter won't respond to power, regardless of the battery's charge level. Ensure that the throttle lever is correctly engaged before attempting to ride.
Troubleshooting Steps:
Check Battery Charge: Verify the battery's charge level and ensure it is sufficiently charged before use.
Inspect Motor Connections: Examine the motor connections for any signs of looseness or damage. Secure all connections properly.
Seek Professional Assistance: If you suspect a motor issue or are unsure of the problem, consult a certified repair shop for expert inspection and resolution.
Verify Throttle Position: If your scooter has a throttle lever, confirm that it is in the correct position before attempting to ride.
Embrace Smooth rides and proactive care

Navigating the world of electric scooters may come with its fair share of challenges, from troubleshooting error codes to ensuring proper maintenance. However, armed with the knowledge gained from this comprehensive guide, you're better equipped to conquer these hurdles and enjoy the thrill of smooth rides.
Remember, regular servicing and attentive battery maintenance can extend the lifespan of your electric scooter, providing countless hours of eco-friendly and efficient transportation.
Keep a keen eye out for wear and tear, addressing issues promptly to prevent them from snowballing into larger problems. Also, ensure that you get your electric scooter from a reputable company
As you embark on your electric scooter journey, don't hesitate to explore the vibrant community of riders, where valuable tips and experiences are shared. Embrace the joys of gliding through city streets, knowing that you have the know-how to overcome common challenges that may arise.
Whether you're a seasoned rider or just beginning your electric scooter adventure, safety and responsible usage are paramount. Always wear proper protective gear, adhere to local regulations, and respect pedestrians and other road users.
Now, with the wind in your hair and the thrill of mobility at your fingertips, venture forth and embrace the freedom of electric scooters with confidence and excitement. Happy riding!
FAQ'S
How do you fix an electric that wont turn on?
- Ensure the power switch is turned on.
- Inspect the fuse or circuit breaker.
- Attempt to start the scooter by pushing it.
- Charge the battery pack for the full recommended duration.
- Visually, tactilely, and olfactorily examine the motor.
- Test both the fuse or circuit breaker, as well as the brake lever switch.
Is my scooter battery dead?
If your scooter displays reduced speed, sluggishness, emits a feeble horn sound, and its lights appear dim, it's likely that the battery requires recharging. Your user manual will provide insights into the expected performance duration or distance on a complete charge, although the power typically wanes as the charging cycle nears completion.
Where is reset button on power scooter?
It is usually a small red button that can be pressed with a pen or other tool. In some models, the reset button may be located near the power switch or on the charger.
Can you rise an electric scooter with a dead battery?
Indeed, when the scooter is switched off, the motor disengages completely, allowing the scooter to be used safely as a manual kick-push mode of transportation.